
In the Robo Rumble Event, three players battle as a team against 9 waves of robot enemies to protect a safe with 45,000 health for 2 minutes. With each win, the difficulty will increase in the next level. Robo Rumble is an unranked mode, so Trophies cannot be earned or lost. Brawlers' attacks and Supers are 50% less effective at charging Supers in this mode.
The first wave starts immediately and each new wave of robots starts 12 seconds after the prior wave began. The 5th wave, referred to as the big robot wave, has a 24-second gap between it and the 6th wave instead. This results in 9 total waves with two "sets" of 4 waves of robots with different quantities and types. The second set ramps up the difficulty presented in the first set with more stronger robots that you must hold off for the remainder of the match. If the robots are not destroyed after 25 seconds, they will become enraged and gain extra movement speed. If they are not destroyed again after 40 seconds, they will become more enraged once, attacking the safe directly.
Robot Types
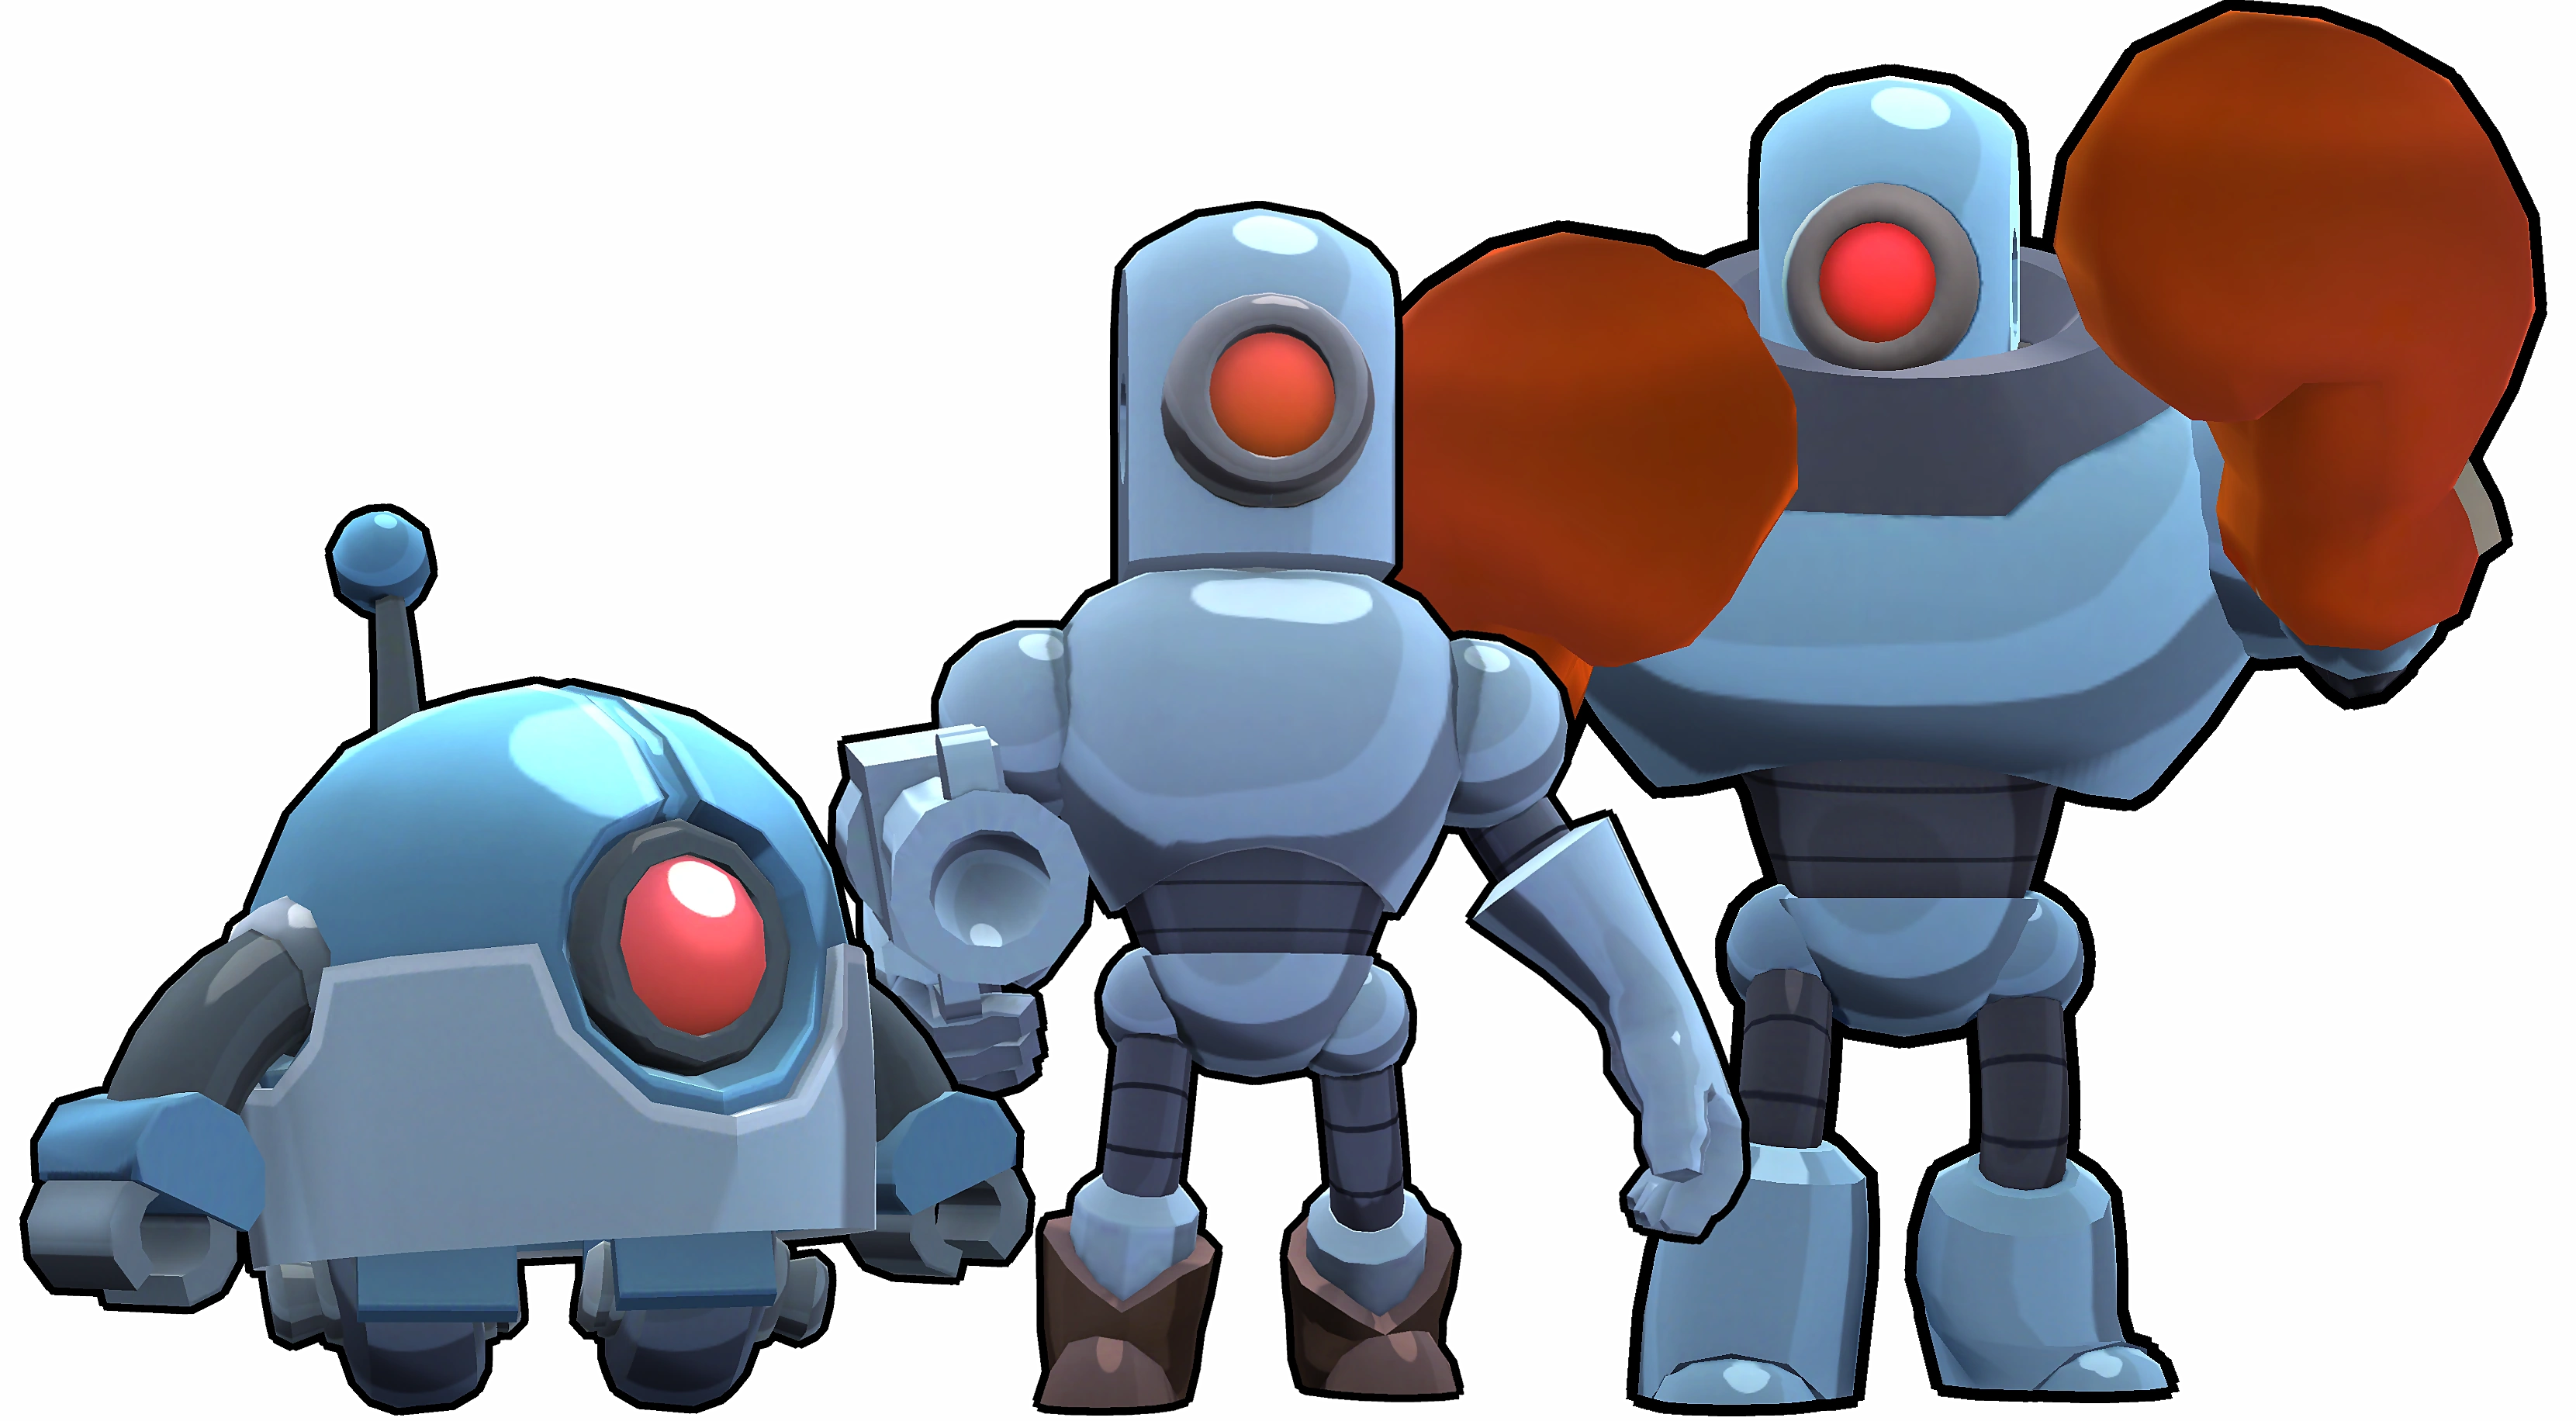
There are four types of robots:
- Melee Robot: These robots are known for their high health, low damage, movement speed and range, but fast attacking speed. They have a rather slow movement speed of 600, but attack nearby Brawlers in a 1.67 tile radius every 0.4 seconds. They have a boosted range of 2 tiles when furious/enraged.
- Sniper Robot: These robots are known for their low health, high damage and range, but slow attacking speed. They have a higher than average movement speed of 750, and attack nearby Brawlers in a 9 tile radius every 1.4 seconds with the use of fast moving bullets.
- Mini Robot: These robots are known for their medium health, damage, fast movement speed and attacking speed. They have a very fast movement speed of 900, but attack nearby Brawlers in a 1.67 tile radius every 0.6 seconds. They have a boosted range of 2 tiles when furious/enraged. Mini robots only start to appear once robots start to get angry.
- Big Robot: The big robot has both a melee attack and ranged attack. They arrive on wave 5 individually. Big robots act as stronger versions of melee robots and have one extra tile of range for their melee attacks. Normal big robots' range attacks have a range of 13.33 tiles, however their angry/furious counterparts only have a range of 10.67 tiles. Big robots only use their ranged attack when a Brawler is in their line of sight. The attack shoots six slow moving missiles which breaks walls and each do 900 damage on contact. The big robot will continue using their melee attack until they can use their ranged attack after using it.
Robot Statistics
| Robot Statistics | Normal | Angry | Furious | Enraged |
|---|---|---|---|---|
| Melee Robot Health / Damage | 4800 / 260 | 6800 / 470 | 11000 / 600 | 16200 / 730 |
| Sniper Robot Health / Damage | 2000 / 630 | 3600 / 1130 | 4600 / 1450 | 6700 / 1760 |
| Mini Robot Health / Damage | 3000 / 400 | 5400 / 720 | 6900 / 920 | 10080 / 1120 |
| Big Robot Health / Damage | 45000 / 600 | 55000 / 640 | 65000 / 680 | N/A |
| Color | Grey | Purple | Red | Yellow |
Levels
Every time you complete a level, the match's difficulty gets harder. The last level that you can challenge is Insane XVI.
| Level | Robot Type | Big Robot Type |
|---|---|---|
| Normal | Wave 1-7: Normal Wave 8-9: Angry |
Normal |
| Hard | Wave 1-3: Normal Wave 4-9: Angry |
Angry |
| Expert | Wave 1-2: Normal Wave 3-4: Angry Wave 6-9: Furious |
Furious |
| Master | Wave 1: Normal Wave 2-3: Angry Wave 4-6: Furious Wave 7-9: Enraged |
Furious |
| Insane - Insane II | Wave 1: Normal Wave 2: Angry Wave 3-4: Furious Wave 6-9: Enraged |
Furious |
| Insane III | Wave 1: Normal Wave 2: Angry Wave 3: Furious Wave 4-9: Enraged |
Furious |
| Insane IV - Insane V | Wave 1-2: Angry Wave 3: Furious Wave 4-9: Enraged |
Furious |
| Insane VI - Insane VII | Wave 1: Angry Wave 2-3: Furious Wave 4-9: Enraged |
Furious |
| Insane VIII - Insane X | Wave 1: Angry Wave 2: Furious Wave 3-9: Enraged |
Furious |
| Insane XI - XII | Wave 1-2: Furious Wave 3-9: Enraged |
Furious |
| Insane XIII - XVI | Wave 1: Furious Wave 2-9: Enraged |
Furious |
Useful Brawlers
- 8-BIT: 8-BIT does excellent damage from a safe distance, and the damage boost from his turret is as good as having a 4th team member. He has a lot of long corridors to shoot down, though will do less damage to robots standing at corners in those corridors due to his projectiles not wrapping around corners at all, so lure those robots a little closer first to do maximum damage per shot. Save his first turret for the first big robot, then start using them for the safe as well. If he puts his Super by the safe, he can use his Gadget Cheat Cartridge to teleport to the safe if they're in critical danger.
- Pam: Pam has really high damage output if all her scrap pieces hit a target, and above-average health. She can also use her healing station to keep teammates alive. Both her Star Powers are great options, planting her Healing Station adjacent to the Safe can damage Mini and Melee bots if you use Mama's Squeeze, and Mama's Hug is a good healing option that can help with soaking damage from big robots.
- Jessie: Jessie can place her Super near the safe so the enemies can be eliminated faster or decide to attack Scrappy instead to heal it with her Energize Star Power. Jessie's Star Power Shocky allows the turret to hit multiple enemies with each attack using Shocky, tripling its damage output.
- Rosa: When Rosa has her Super activated, she can easily take hits for the team or for the safe. In addition, she has a wide-area attack that reloads fairly fast. Rosa's Super can be constantly charged with the right positioning, and she can make full use of healing abilities when her shield is active.
- Frank: Frank's usefulness comes from their stunning Super and massive amounts of health. Frank's Super also breaks walls and should be used carefully late-game where it's the most needed. Frank doesn't need to worry about ammo consumption because of their incredibly fast reload speed. They serve to counter the melee and mini robots which are hard to kill late-game, while their teammates take down the snipers. Ideally, Frank should focus on stunning clusters of robots at a time until he can wipe them out with help of his Power Grab Star Power.
Tips
- Don't be separated from your team. Try to stay close to the safe and destroy as many robots as you can. Only a few Brawlers can use bait strategies, and the ones that can have to rely on Star Powers/Gadgets effectively cutting the damage output to the robots by a third.
- Respawn time is 8 seconds instead of the normal 5, so it is important to stay alive. 8 seconds in terms of damage is valuable. In the case you do die, use your invincibility shield when you respawn to shield teammates and the safe.
- Set up a perimeter around the safe with your teammates, guarding every entry point. Failure to do this will result in some projectiles hitting the safe before you can react.
- In the early game, try to make sure everyone charges their Super since the weaker robots make this easier.
- Place turrets immediately adjacent to the vault, not centered on it, so that they can protect the safe from robot projectiles and melee damage in an emergency. If a teammate is neglecting one side of the safe, put the turret on that side. If you have multiple team members with turrets, place the turrets on different sides of the vault to maximize protection.
- Fight the big robots far enough away from the safe that they won't damage it or the closest walls, but close enough to the safe that you can quickly return to protect it from the next wave of robots after defeating the big robots.
- Use the fewest shots needed to kill a robot. If you waste too many shots while killing robots, you won't have that attack ready for when more robots arrive (this is especially crucial towards the end of the game). Take into account the damage your teammates typically do in finishing off the robots.
- Before the game starts, you can calculate how many shots you need to take out a single robot based on its type/color. Use this to save ammo.
- If you have something that deals passive damage to enemies (like Jessie's turret or Tara's attacking shadow), you can let it finish a weakened robot to save a shot.
- Brawlers who can destroy walls (e.g. Shelly, Bull or Brock) may pose a disadvantage in this mode since this leaves the safe more open for damage from robots.
History
- On 7/12/17, the Robo Rumble event was added to the game.
- On 22/12/17, enemies always spawn at the northern side of the level. Spawns are no longer dependent on players' location.
- On 16/1/18, the second and third bosses' health were increased. Map adjustments to make luring enemy bots together impossible.
- On 27/9/18, the Robots now enrage after 90 sec giving them a huge movement speed buff.
- On 5/12/18, the Robo Rumble map was adjusted.
- Larger map with enemies attacking from all sides.
- Charge ability removed from high level melee bots.
- On 27/2/19, after robots enrage, they will target the safe.
- On 15/4/19, fixed an issue where the enraged melee robots were not hitting the safe.
- On 26/3/20, fixed an issue with the Big Robot sometimes getting stuck when spawning.
- On 13/5/20, Robo Rumble now has a maximum timer of 2 minutes that the players must survive in order to win. The highest time has been replaced with highest beaten level in profiles.
- On 16/6/20, fixed a bug where Robots did not attack the Safe when players were hiding behind a Sprout wall.
- On 2/7/20, the Hard, Expert and Insane difficulty levels are now slightly easier. Robots now enrage after 25 seconds and gain a speed boost, and will now attack the Safe directly after more 40 seconds.